Email: office@boldimaging.com
Phone: 647-229-2369
Virtual Tour - Image Download Tutorial
The digital images that make up your Virtual Tour can be downloaded to your computer in 4 different resolutions. These are MLS sized, a small website image (displays up to approx. 7inches on average website), a larger website image (displays up to approx. 12 inches) and finally the original large format files suitable for feature sheets and advertising.
This is a detailed step by step tutorial.
You can access your virtual tour download page from two places, the first as shown below from the email sent to you when your tour was uploaded.

The other location is if you are LOGGED IN (Boldimaging.com) and using the "Tools" pop out menu from within the virtual tour. Note this tools menu is only visible to you and only if you are logged in.

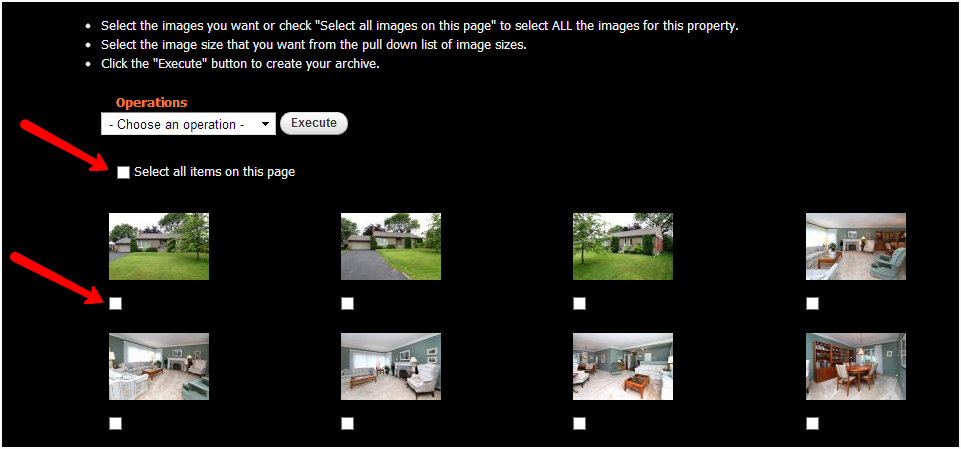
Once in the download interface, either select all images or check only specific images that you wish to download to your computer..
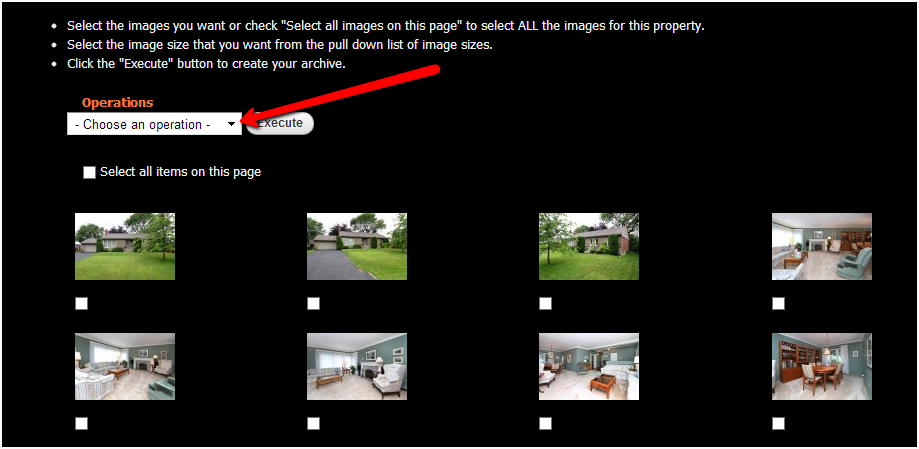
Then click on "choose an operation" and a drop down menu will give you your choices of images sizes
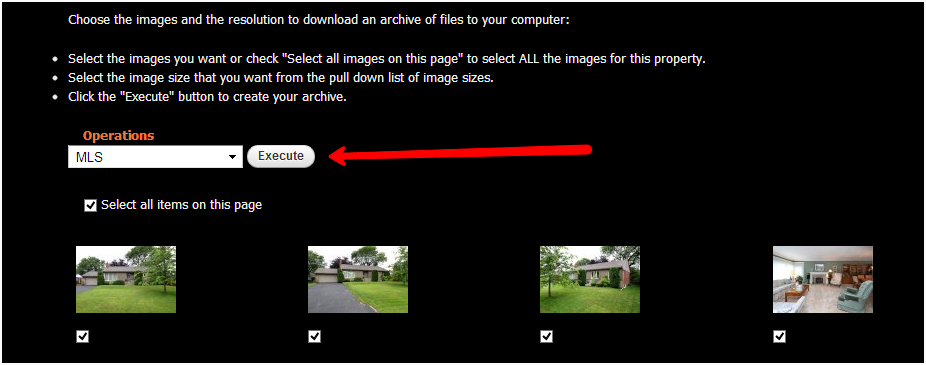
For example we selected MLS sized images. Now click Execute.
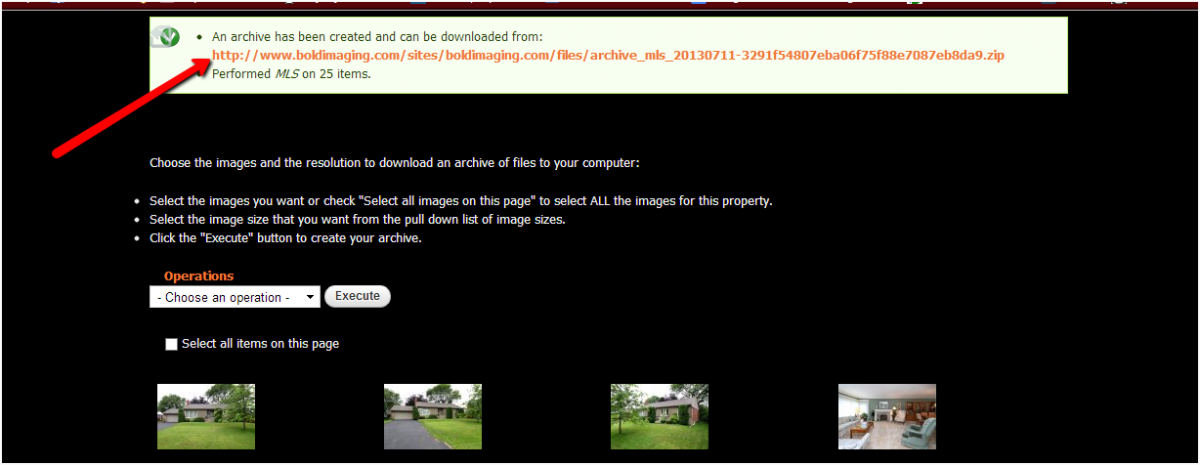
You will asked to confirm the images for download. The software will then proceed to create an "Archive Zip" folder with all the selected images for download to your computer.

An archive file (which contains all the files in the format you selected) is then created. When created you will see the following pop up box at the top of your screen, Click on the Orange colored File Name and it will be downloaded to your computer. This file will normally be downloaded to your "Downloads Folder."
If you are familiar with zip files extract them to the folder of your choice.
If you not familier with a zip file here is an easy way to extract the images to the folder of your choice. If you open (double click) the downloaded archive file in the downloads folder, you will only see the file names and blank thumbnails. This is because they are compressed and have to be extracted.
Zip Folder in Downloads

zip folder

If using latest versions of Windows, Click "Extract All" shown by the red arrow in the image above and follow instructions (in older versions you may have to right click the folder and click on "Extract All").
Mac, Just double click the folder and it will extract files.
Now that the images have been removed from the zip file you will see the image icons and these images are now accessible for uploading or printing.

As always, if further help is needed call us at 647-229-2369 and we will be happy to walk you through any functions on our website.
![]()
Bold Real Estate Imaging offers Professional Virtual Tour Photography, HDR photography, HD Video, Home Staging, Feature Sheets and Floor Plans. Variety of packages available.
Our areas of service include Toronto, Mississauga, Brampton, Oakville, Burlington, Milton, Georgetown, Cambridge and Guelph. Call us to see if we service your area.
© Copyright BOLD Imaging Inc., 2011-2020. All Rights Reserved. Site developed by LiquidCMS